Saturday, January 29, 2011
Framed baby bunny blossoms
For this card I used the layout from Stampin' Royalty.
The colors are from Create, Ink. Bashful Blue, Perfect Plum and Basic Gray.
The bunny is cut out and popped up overtop the frame image from the new Baby Blossoms set. I decided to try to make my own patterned paper with the flowers from the set. I stamped in bashful blue, perfect plum and basic gray.
I distressed the edges, corner rounded and added a frill from the ribbon trim punch.
The background is perfect plum textured paper and is embossed with dots embossing folder in the Big Shot.
My embellishments are two colors of ribbon, a button and 3 brads.
I had fun making this. I'm not sure yet what occasion I'll be using the card for. I think it could work well as a baby card, birthday or just thinking of you!
Tuesday, January 25, 2011
Tulips in a Vase
The challenge at Splitcoast was to combine the colors - Riding Hood Red, Soft Suede and Elegant Eggplant! Also to layer die cuts (if you wanted)
The layout is from Clean and Simple Stamping.
I used 2 different embossing folders - I just love embossing!
The flowers are made with the bird wing from the bird punch. The vase is the ornament punch with the bottom clipped off.
I popped up and layered the sentiment with the word window punch and one of the little frames from the Matchbox die.
Monday, January 24, 2011
Baby Blossoms BLUES
Here's my first attempt at my new stamp set - Baby Blossoms. Also matching designer series paper from the new Stampin' Up! mini catalogue.
You definitely want to line up the flower images with a stamp-a-ma-jig to get placement that looks nice.
This is my interpretation of the fabulous layout from Just Add Ink.
I love this color combination.
I added pearls and piercing. The Top Note die is so very versatile!
Stamp sets: Baby Blossoms, Short & Sweet
Colors: Baja Breeze, Chocolate Chip, Very Vanilla, Springtime Vintage DSP
Thursday, January 20, 2011
Lighthouse for guy
This is my new set "Uncharted Territory" that I got today! I find it harder to make cards for guys and I think this one is a great one that will be very versatile.
The layout is from Pals Paper Arts - isn't it great! I knew it would fit this set really well.
The color combination is from Splitcoast this week - Baja Breeze, Pear Pizzazz, Bravo Burgundy
I stamped the lighthouse image 3 times - baja, white and burgundy and cut the white and burgundy pieces out that I wanted and pieced the scene together!
I added some texture with crimping and I inked a texturz plate.
The sentiment from "Hodgepodge Happiness" fit just right with this guy card. I embellished with brads and linen thread.
I love the white layers and the white lighthouse that I think really pops!
Wednesday, January 19, 2011
Set 5
Here's the fifth and final set of cards for the card class on Saturday! With Valentine's Day coming up I couldn't resist making a traditional Valentine type set. Although it could also be used for birthday or something else.
This card uses a recent Fall-To-Layout from Clean and Simple stamping.
The heart is actually stamped (Punch Potpourri set). I added some piercing for fun!
This set shows a lot of texture from my favorite - embossing folders!
For both cards I'm using the hostess patterned paper - Blushing Bride and Poppy Parade.
Monday, January 17, 2011
Card Class - Set 4 - Pun Fun!
Here's the fourth set of cards for the card class. Some fun and bright colors with the really cute Pun Fun set!
On this card I created a bit of a hole to spotlight the ribbon! Really easy to do, just use your circle punch!
On this card we're using circles to make a scalloped border. I'm also using my fun FAT ribbon!
Both cards are using watercolor paper, and watercoloring with aqua painter and watercolor wonder crayons!
Sunday, January 16, 2011
My first Matchbox!
Here is my first attempt with the Matchbox die. Normally I am quite scared of making 3D items, but I'm trying to get out of my comfort zone and try something new!
This is actually the 3D project we'll be making at Saturday's class!
I used Not Quite Navy, Marina Mist and white. I sponged the sentiment layers. The butterflies are made of vellum!
I didn't realize how TINY this box is and how CUTE! I'm quite pleased with it and will be experimenting with it more in the future!
I put a Loonie (Canadian dollar coin) in there so you can get some idea of how small this is.
Saturday, January 15, 2011
Another Butterfly - texturized
Here's another butterfly card for you.
This one is all about TEXTURE! for the Free For All Challenge - texturize me (use more than 2 embossing textures)
The card I made was inspired by the Queen for the Day this week - JovialJudi. Her card is here.
Also for the Ways to Use it Challenge - butterflies!
I got the colors from this great site - ColorLab Color Challenge#24 - Blushing Bride, Rose Red, Soft Suede and a touch of Crumb Cake!
I used 2 embossing folders and the beautiful wings embosslit. Also used the buttons die cut and butterfly die. Punches - oval, scallop oval and ribbon trim.
A strip of bling and a sentiment from Occasional Quotes (hostess set)
Close up...
Thursday, January 13, 2011
Beautiful butterflies - monochromatic red
Here's the card I made today. It's for a bunch of challenges that work together really well. I haven't played along with any challenges recently and I was so pleased to find all these that really sparked an idea in my head.
Today's Ways to Use it challenge on Splitcoast - butterflies!
Pals Paper Arts - inspiration photo
Just Add Ink - monochromatic
SUOnly Challenges - add bling!
I even decorated the inside - which you can see a little bit.
First I started out with a butterfly die cut - negative space. I stamped the rose from 5th Ave Floral in the "masked" area. I also sponged with two shades of red.
Then I added a bunch of beautiful wings embosslit butterflies (in different shades of red - real red, riding hood red, cherry cobbler - in keeping with the monochromatic theme!) I LOVE monochromatic!
I stamped the sentiment from Hodgepodge Happiness (which matched so well!) and added ribbon and rhinestones! Voila! I'm so pleased with this one!
Wednesday, January 12, 2011
Set 3 - Punch Art Penguins
This is the 3rd set of cards we'll be making next Saturday at the class!
This penguin is made of punched and die cut pieces. I gathered other people's penguin ideas and then created this one.
This penguin is also made of punched pieces.
I ripped some snowy hills in the background and also sponged some clouds.
The class is Saturday, January 22nd at my house from 10-3. Please bring your own lunch. You must pre-register! The class is almost full!
Monday, January 10, 2011
3 for Featured Stamper - Marisa!
I made 3 cards inspired by last week's Featured Stamper - Marisa! My blog friend a.k.a. WhiteRockMama. Here's her beautiful gallery.
Sunday, January 9, 2011
Set 2
Saturday, January 8, 2011
Set 1
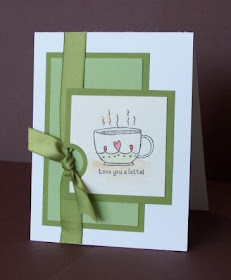
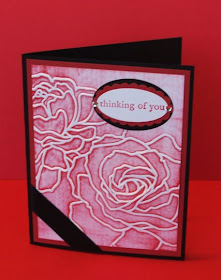
Here's the first set of cards we'll be making at my upcoming card class. As you can see this set has a rose and color theme!
Close ups of the cards.
Hope you can come to my class. You must pre-register as space is limited! (I still have room in both classes).
Thursday, January 13th - starting at 7 pm
Saturday, January 22nd - 10-3
Watch for more card previews!
Thursday, January 6, 2011
Operation Christmas Child - Month 1
I haven't been making any cards in the past week or so so I've been absent from blog-land. However, I wanted to share a different project with you today.
This year I had the very fun priviledge of being able to volunteer at the Operation Christmas Child warehouse. (What was even more special is that I got to go with my neice!) Anyways it was lots of fun and I'd love to do it again sometime.
I thought that this year I will try to make more shoeboxes. If I spread the cost over the whole year then I'm able to make more! (My goal this year is to make at least 15!)
I thought I would start with some Boxing Week shopping to see if I could pick up any specials. I was able to find a few things...
The things I found this month - notepads, pens, erasers, puzzles, teddies, stickers, toy cars, candles, wash cloths
The good thing about shopping for so many you can get cheaper prices by buying packages with multiple items/package.
I organized myself by first choosing the age/sex and how many of each I wanted to build. Then I wrote a list of things I would like to find and hopefully the price I am aiming for. All the things I bought this month I was able to find at the price I hoped for or in most cases, even cheaper!
I got lots of fantastic ideas while volunteering. I'll keep on showing you what I find as the year goes on.
I hope you're inspired create some of your own shoeboxes! If you don't know what I'm talking about it's Samaritan's Purse - Operation Christmas child project. I've participated for many years already and I LOVE doing it.
If you've made shoeboxes before and have some great ideas of what to put in there - please comment and share your thoughts with me!
Saturday, January 1, 2011
2 Scrapbook Pages - March 2009
This is what I've been up to! I've been scrapbooking again! I'm 2 years behind and just finished Christmas 2008. These are the photos from March 2009.
The first page is the pictures of my kids at 3 and 1 year old.
The second page is also from March 2009 with me and my mom and various cute pictures of my growing "buddy boo"
On these pages I used 5th Ave Floral and the hostess set Punch Potpourri. I cut/punched all the flowers out. I also used little leaves die and manhattan flower embossing folder.
These pages are for Stampin' Royalty's challenge this week to do scrapbook pages.